引言 看了小组件的概述,你肯定想马上搞一个小组件出来试试,实践中学习效果更佳
本文大纲
创建小组件
第一步:先创建好一个App,步骤省略
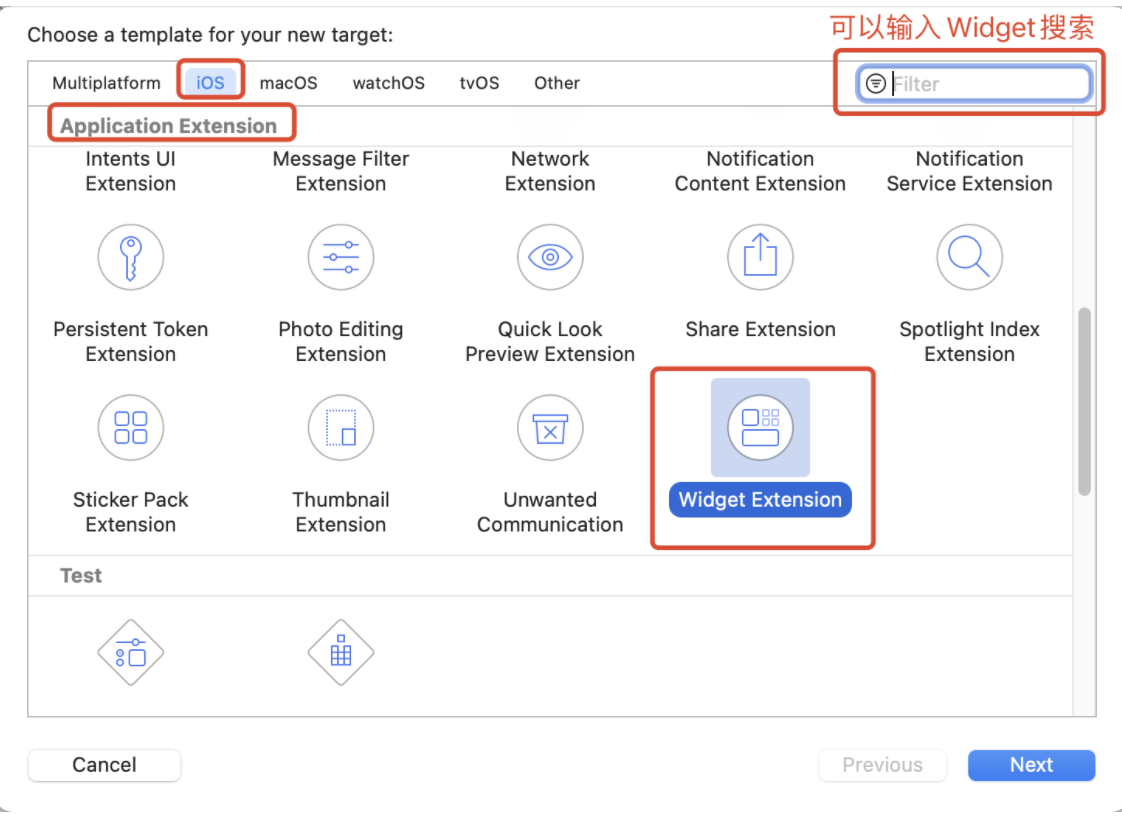
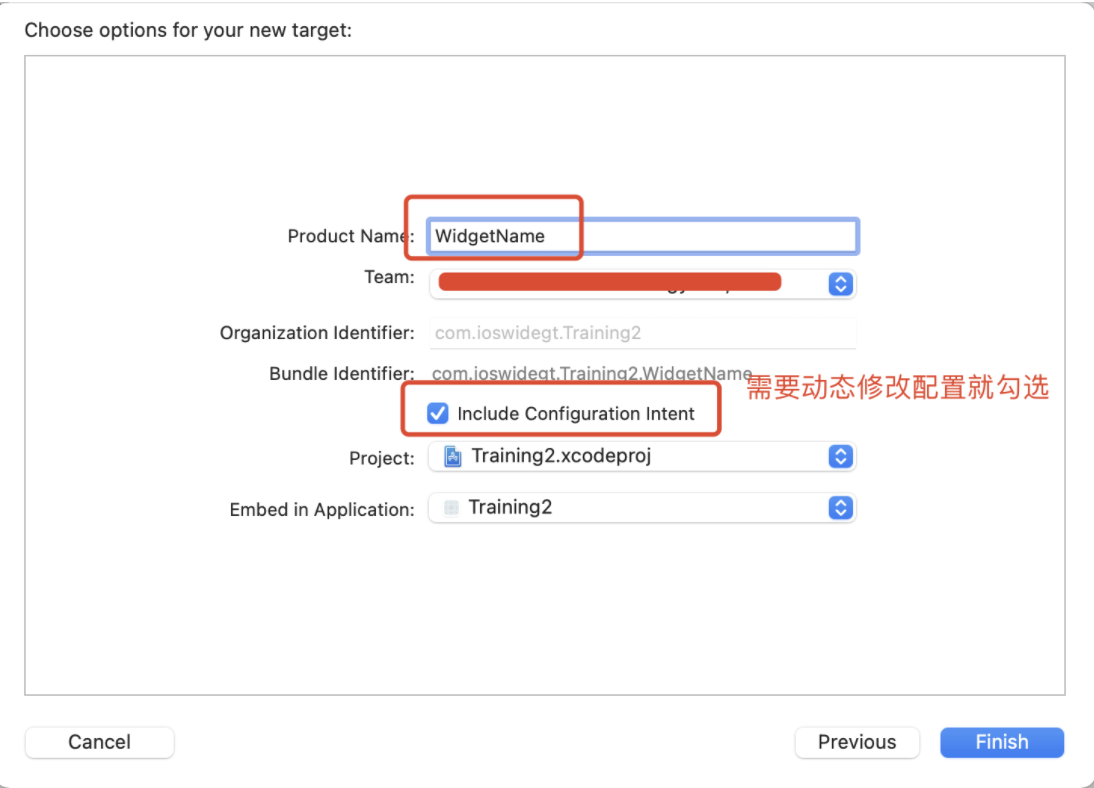
第二步:在App中创建小组件 1. 在Xcode中打开您的应用程序项目,然后选择 File > New > Target。 2. 从“Application Extension”组中,选择“Widget Extension”,然后单击“Next”。 3. 输入小组件的名称。 4. 如果需要给小组件提供用户可配置的属性,请选中“Include Configuration Intent”复选框。 5. 单击 Finish。
认识小组件框架各个组成部分 如果没有勾选“Include Configuration Intent”,默认生成如下代码,这里新建的时候小组件的名字是 “Widget1”
1 2 3 4 5 6 7 8 9 10 11 12 13 14 15 16 17 18 19 20 21 22 23 24 25 26 27 28 29 30 31 32 33 34 35 36 37 38 39 40 41 42 43 44 45 46 47 48 49 50 51 52 53 54 55 56 57 58 59 60 61 62 63 64 65 66 67 68 69 70 71 72 73 74 75 76 77 import WidgetKitimport SwiftUIstruct Provider : TimelineProvider { func placeholder (in context : Context ) -> SimpleEntry { SimpleEntry (date: Date ()) } func getSnapshot (in context : Context , completion : @escaping (SimpleEntry ) -> ()) { let entry = SimpleEntry (date: Date ()) completion(entry) } func getTimeline (in context : Context , completion : @escaping (Timeline <Entry >) -> ()) { var entries: [SimpleEntry ] = [] let currentDate = Date () for hourOffset in 0 ..< 5 { let entryDate = Calendar .current.date(byAdding: .hour, value: hourOffset, to: currentDate)! let entry = SimpleEntry (date: entryDate) entries.append(entry) } let timeline = Timeline (entries: entries, policy: .atEnd) completion(timeline) } } struct SimpleEntry : TimelineEntry { let date: Date } struct Widget1EntryView : View { var entry: Provider .Entry var body: some View { Text (entry.date, style: .time) } } @main struct Widget1 : Widget { let kind: String = "Widget1" var body: some WidgetConfiguration { StaticConfiguration (kind: kind, provider: Provider ()) { entry in Widget1EntryView (entry: entry) } .supportedFamilies([.systemSmall, .systemLarge]) .configurationDisplayName("组件标题" ) .description("组件描述" ) } } struct Widget1_Previews : PreviewProvider { static var previews: some View { Widget1EntryView (entry: SimpleEntry (date: Date ())) .previewContext(WidgetPreviewContext (family: .systemSmall)) } }
复制
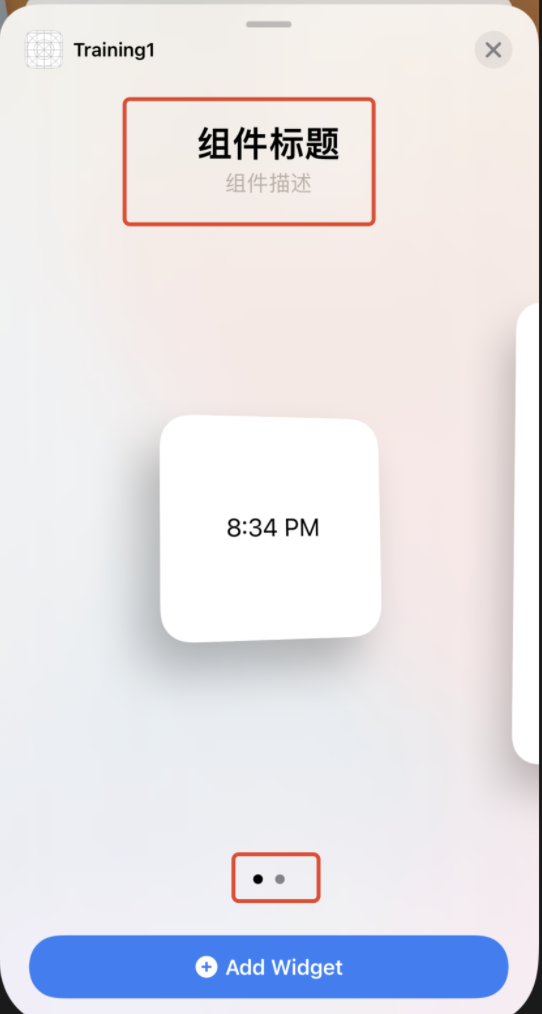
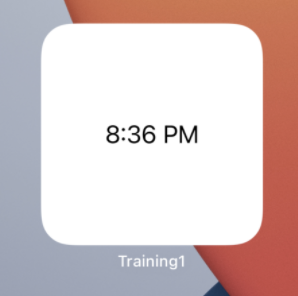
运行上面的代码,在桌面添加一个小组件,效果如下(对着图再看上面的代码注释就能一一对应上)
小组件核心代码 1 2 3 4 5 6 7 8 9 10 11 12 13 14 15 16 @main struct Widget1 : Widget { let kind: String = "Widget1" var body: some WidgetConfiguration { StaticConfiguration (kind: kind, provider: Provider ()) { entry in Widget1EntryView (entry: entry) } .supportedFamilies([.systemSmall, .systemLarge]) .configurationDisplayName("组件标题" ) .description("组件描述" ) } }
复制
小组件核心代码注解如下:
kind是标识小组件的唯一ID
body也是必须实现的,返回小组件的配置信息
StaticConfiguration 标识小组件不支持动态修改配置(后面会详细展开) .supportedFamilies 设置小组件的尺寸类型,总共三种:.systemSmall, .systemMedium, .systemLarge .configurationDisplayName(“组件标题”) .description(“组件描述”)
Provider是给小组件提供刷新策略以及给小组件准备数据的核心
Widget1EntryView(entry: entry),根据Provider提供的数据实体entry绘制小组件的UI
结语 默认新建一个小组件,开发工具已经默认生成了一份完整的小组件代码。后续文章会详细讲解其中的各个细节点,比如:Provider的刷新机制,小组件的动态配置,SwiftUI开发入门等
转载自:https://cloud.tencent.com/developer/article/1820739